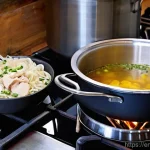
Is there anything more comforting and deeply satisfying than a bowl of perfectly crafted ramen? For years, I just assumed that incredible, complex broth was something only true masters in hidden back alleys of Tokyo could conjure.
I mean, the richness, the layers of flavor – it felt like a culinary secret guarded by generations. But let me tell you, after countless hours in my own kitchen, experimenting with different ingredients and techniques, I’ve had a massive epiphany: creating that soul-warming ramen broth at home isn’t just possible, it’s an incredibly rewarding journey.
Forget those instant packets; once you taste the difference of a homemade broth, infused with your own care and attention, there’s simply no going back.
It’s truly a game-changer for anyone who adores ramen. Ready to unlock the secrets to your most incredible ramen bowl yet? Let’s get into the nitty-gritty of how to craft that perfect broth in the detailed guide below.
The Unsung Heroes: Building Your Broth’s Foundation

You know, for the longest time, I thought the secret to an amazing ramen broth was some kind of ancient, mystical ingredient only found in remote parts of Japan.
Boy, was I wrong! It turns out, the real magic starts with the humble, everyday components you can find right at your local grocery store. It’s all about how you treat them, the care you put into selecting the best quality bones, and the way you coax out every ounce of flavor from your aromatics.
Think of it like building a house – a strong foundation is absolutely critical. Without it, everything else just crumbles. I’ve personally experimented with countless combinations, from just chicken bones to a mix of pork and chicken, and what I’ve learned is that starting with fresh, high-quality ingredients isn’t just a suggestion; it’s the cornerstone of a truly transcendent broth.
Skipping corners here, whether it’s opting for old bones or rushing the initial wash, will absolutely impact your final product. Trust me, I’ve made those mistakes, and the difference is palpable.
This isn’t just about cooking; it’s about crafting an experience, one delicious spoonful at a time. So, let’s dive deep into laying that perfect groundwork for your culinary masterpiece.
Choosing Your Bones and Aromatics Wisely
When I first started, I’d grab whatever bones looked cheapest, thinking “bones are bones, right?” Wrong! The type and quality of your bones make a colossal difference.
For a richer, more opaque broth, pork bones, especially trotters and neck bones, are incredible. For a lighter, clearer broth, chicken carcasses or backs are fantastic.
A combination, what I often do, gives you the best of both worlds – depth from pork and a clean finish from chicken. Always ask your butcher for fresh bones; sometimes they even have them pre-cut, which saves a lot of hassle.
And don’t forget to give them a good rinse and a blanching bath – that quick boil, maybe 10-15 minutes, followed by a thorough rinse under cold water, is non-negotiable.
It gets rid of impurities that can make your broth cloudy and give it an off-flavor. For aromatics, I stick to the classics: onions, ginger, and garlic.
A whole onion, halved; a few substantial chunks of ginger, no need to peel; and a head of garlic, sliced in half horizontally. These aren’t just fillers; they are flavor amplifiers that will infuse your broth with an aromatic complexity that store-bought versions can only dream of.
The Art of the Initial Simmer: Skimming for Clarity
This step, honestly, is where many home cooks, including my past self, might get a little lazy. And I get it, you want to get to the good stuff! But skimming, truly skimming, is paramount for a beautiful, clear ramen broth.
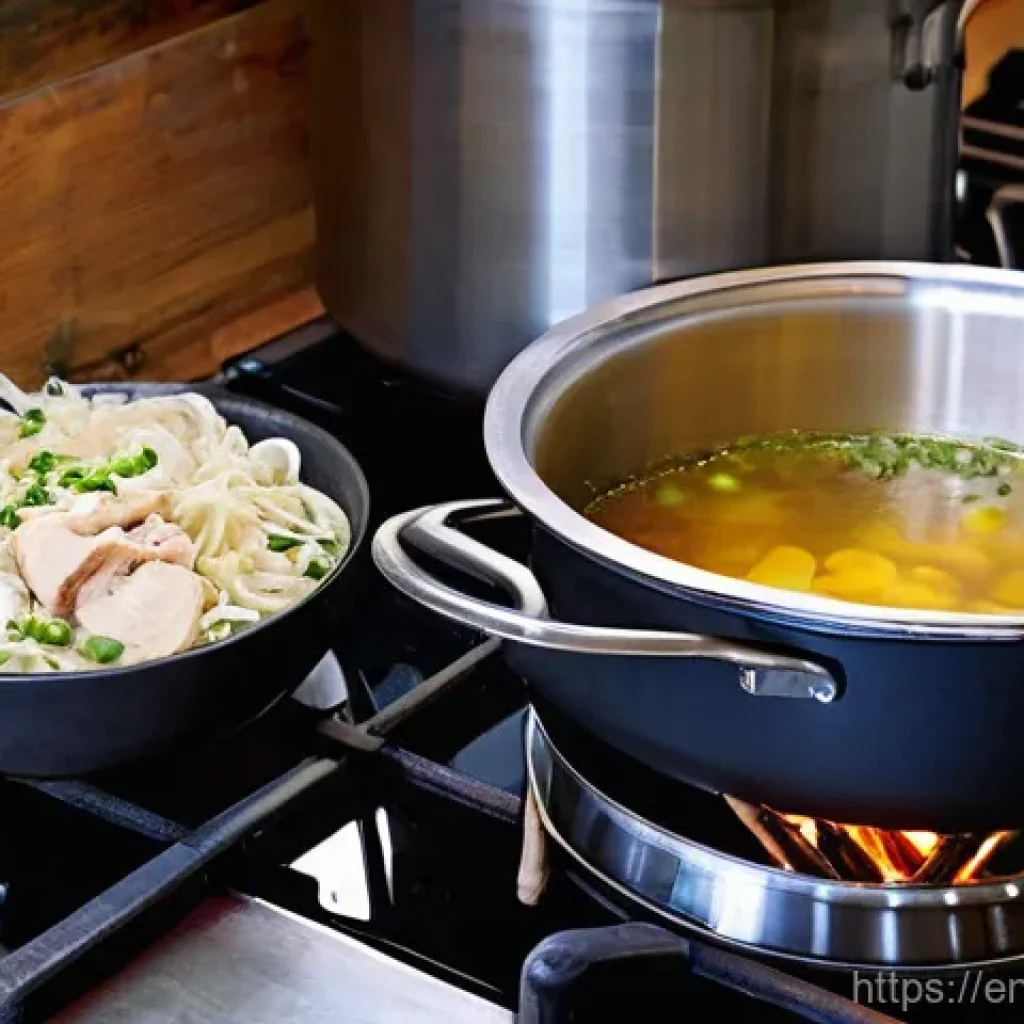
After you’ve blanched and rinsed your bones, and added your fresh aromatics and cold water to the pot, bring it to a very gentle simmer. As it slowly heats up, you’ll start to see a grayish-brown foam rise to the surface.
This is all the undesirable stuff – impurities, blood, and bits of bone marrow – that you absolutely do not want in your finished broth. Get a fine-mesh skimmer or a ladle and patiently, meticulously, remove every bit of that foam.
It takes time, maybe 20-30 minutes of diligent skimming, but I promise you, the effort pays off tenfold in the final clarity and clean taste of your broth.
If you skip this, your broth will be murky and can have a slightly bitter or metallic aftertaste. Think of it as polishing a gem; the clearer it is, the more it shines.
Unlocking Umami: Beyond the Basic Ingredients
Once you’ve got that pristine, beautifully simmering base going, it’s time to think about adding those layers of umami that truly elevate a ramen broth from good to unforgettable.
This is where you start to feel like a true culinary artist, meticulously adding elements that build a symphony of flavors. I remember the first time I consciously started incorporating ingredients specifically for their umami contribution; it was like a lightbulb went off in my kitchen.
The depth, the savoriness, that almost indescribable “moreishness” – it transformed my ramen from a simple meal into an experience. It’s not just about throwing things in; it’s about understanding what each ingredient brings to the party and how it interacts with everything else.
This isn’t something you’ll find in an instant ramen packet, nor can you replicate it with just salt and pepper. This is the heart and soul of authentic, deeply flavorful broth, and it’s a journey of discovery that’s incredibly rewarding.
Getting these elements right makes a massive difference in how your broth feels on the palate, and how long that amazing flavor lingers after each sip.
Diving Deep with Dried Delights: Kombu and Shiitake
These two, my friends, are absolute game-changers for umami. Kombu, a type of dried kelp, brings a subtle, oceanic depth that’s utterly unique. You don’t want to boil it vigorously; instead, I usually add a piece (about 4-6 inches) to the simmering broth for the last 30-60 minutes, or even just let it steep in the cooling broth as it finishes.
Overcooking kombu can make your broth slimy and bitter, so timing is key. Dried shiitake mushrooms are another umami powerhouse. Just a handful, rehydrated and then added to the simmering broth, will lend an earthy, deeply savory note that complements the bone broth beautifully.
You can even use the soaking liquid from the shiitake for an extra boost of flavor! I always keep a stash of both in my pantry; they are incredibly versatile and bring so much character to not just ramen, but many other dishes.
They provide that complex, savory backbone that makes people wonder, “What *is* that amazing flavor?”
The Magic of Mirin and Sake: A Splash of Flavor Depth
While bones and dried ingredients lay the savory groundwork, a strategic splash of good quality mirin and sake can add an incredible layer of sweetness and aromatic complexity.
Mirin, a sweet Japanese rice wine, adds a subtle glaze and brightness, balancing out the richness of the broth without making it overtly sweet. I usually add it towards the end of the cooking process, allowing the alcohol to cook off and leave behind its delicate flavor.
Sake, on the other hand, brings a different kind of magic. It tenderizes any meat you might be using and also helps to round out the flavors, adding a slight alcoholic tang that evaporates into a beautiful aroma.
Don’t go for the cheapest cooking sake; a decent drinking sake will yield much better results, adding a cleaner, more refined taste. Think of these as the seasoning you add to a steak – they enhance, rather than overpower, the main flavors.
Patience is a Virtue: Slow Cooking for Serious Flavor
This is where the magic truly happens, and honestly, it’s the hardest part for me because I’m naturally quite impatient! But I’ve learned, through countless hours hovering over my stove, that there’s no shortcut to a truly profound ramen broth.
You can’t rush the extraction of collagen, gelatin, and all those amazing flavor compounds from the bones. This isn’t just about heat; it’s about time, gentle heat, and allowing nature to do its work.
I remember one time, I tried to crank up the heat thinking I could shave a few hours off the cooking time. The result? A cloudy, greasy, and frankly, disappointing broth that lacked the depth and richness I was aiming for.
It was a tough lesson, but it taught me that some things in life, especially in cooking, simply demand respect for the process. This slow, steady simmer is what transforms humble ingredients into liquid gold, developing that incredible mouthfeel and long-lasting flavor that defines an exceptional bowl of ramen.
Temperature Control: The Gentle Embrace of a Simmer
When I talk about a “gentle simmer,” I mean it. We’re not aiming for a rolling boil here, which can agitate the contents, break down the fat into tiny globules that make your broth cloudy, and even extract off-flavors from the bones.
Think of it more as a lazy bubble bath for your ingredients. Just enough heat to see tiny bubbles occasionally breaking the surface, a slight movement in the pot.
Maintaining this consistent, low temperature is crucial for clear broth and for the gradual, gentle extraction of flavors and gelatin from the bones. I’ve found that using a heat diffuser can really help keep the temperature steady, especially on electric stoves.
If your stove runs a bit hot, consider leaving the lid slightly ajar to prevent it from boiling too vigorously. It’s a delicate dance, but once you get the feel for it, it becomes second nature.
How Long is Long Enough? Finding Your Broth’s Sweet Spot
This is the million-dollar question, and frankly, it varies! For a rich pork broth (tonkotsu style), I’m talking 10-12 hours, sometimes even up to 18 hours.
For a lighter chicken broth (chintan style), 4-6 hours usually does the trick. You’ll know it’s ready when the bones look stripped clean, and the liquid has taken on a beautiful, opaque creaminess (for tonkotsu) or a clear, golden hue (for chintan).
The smell in your kitchen will also be an undeniable clue – it’ll be incredibly rich and inviting. My personal rule of thumb is to check the bones. If they look like they’ve given up all their goodness, almost brittle, then you’re likely in the zone.
Don’t be afraid to taste as you go, too. A small sip every few hours will let you track the flavor development. It’s a journey, not a sprint, and the destination is incredibly delicious.
The Secret Sauce: Seasoning Your Masterpiece
Okay, you’ve put in the hours, painstakingly skimmed, and lovingly simmered your broth to perfection. Now, we’re at the exciting part: seasoning! This is where you truly make the broth your own.
For a long time, I was scared to season because I didn’t want to mess up all that hard work. But I quickly realized that seasoning isn’t just about adding salt; it’s about enhancing, balancing, and highlighting all those amazing flavors you’ve built.
Think of it as the final polish on a beautifully crafted piece of furniture. Without that polish, it’s still good, but it doesn’t quite shine. This stage allows you to tweak the broth to suit your personal preference, to bring out the subtle notes, and to ensure that every single spoonful is packed with robust, satisfying flavor.
It’s a moment of personal expression in your culinary journey, and it’s incredibly empowering to know you’re creating something truly unique.
Balancing Act: Salt, Soy, and Beyond
When it comes to seasoning, my philosophy is “start small, taste often, and build up.” My go-to base seasonings are usually good quality sea salt and a touch of light soy sauce.
The salt provides immediate flavor, while the soy sauce adds another layer of umami and a hint of fermented depth. But don’t stop there! Think about a dash of white pepper for a subtle kick, or a tiny bit of sugar to balance acidity or harshness if your broth tastes a little flat.
Sometimes, I’ll even add a tiny bit of mirin for a touch of sweetness. The key here is not to dump everything in at once. Take a small portion of your broth in a separate bowl, add a tiny bit of seasoning, taste it, and adjust.
This way, you don’t risk over-seasoning your entire batch. It’s like being a chef in your own kitchen, meticulously crafting the perfect flavor profile.
Taste and Adjust: Your Palate, Your Guide

This is, without a doubt, the most important part of seasoning. Your palate is your ultimate guide. What tastes perfect to me might be a little too salty or not quite savory enough for you, and that’s totally fine!
That’s the beauty of homemade food. As you taste, think about what’s missing. Does it need more depth?
A touch more soy or even a tiny amount of fish sauce (if appropriate for your ramen style) can work wonders. Is it a bit bland? More salt is probably the answer.
Does it feel a bit one-dimensional? Maybe a touch of vinegar (like rice vinegar) or a pinch of sugar can brighten things up. Don’t be afraid to trust your instincts here.
This isn’t about following a recipe to the letter; it’s about creating a broth that sings to *you*. After all, you’re the one who’s going to enjoy it!
From Simmer to Storage: Making Your Broth Last
After all that hard work and patience, you’ve got this amazing, deeply flavorful ramen broth. The last thing you want is for it to go bad before you can enjoy every last drop!
Learning proper cooling and storage techniques was a game-changer for me. It means I can spend a big chunk of a weekend making a huge batch, and then have delicious, homemade ramen broth ready to go whenever a craving strikes during the week.
It’s pure convenience, and it saves so much time during busy weeknights. There’s nothing worse than seeing your culinary masterpiece spoil because of a simple oversight in how it was stored.
This planning and execution of storage isn’t just about convenience; it’s about respect for the ingredients and the effort you’ve put in, ensuring that your liquid gold remains perfect until you’re ready to transform it into another incredible bowl of ramen.
Cooling Down Safely: Food Safety First!
This is probably the most crucial step after cooking. Hot broth left at room temperature for too long is a breeding ground for bacteria, and nobody wants that!
My method is to quickly cool it down. First, I remove the bones and any large aromatics, straining the broth through a fine-mesh sieve into a clean pot or heat-proof containers.
Then, I place these containers into an ice bath in my sink. Stirring occasionally helps to speed up the cooling process. You want to get that broth from hot to below 40°F (4°C) within two hours.
Once it’s cool, you’ll notice a layer of fat will solidify on top. I usually leave this layer on until I’m ready to use the broth, as it acts as a natural seal, protecting the broth from air and freezer burn.
Then, when I’m ready, I just easily scrape it off.
Freezing for Future Feasts: Meal Prep Like a Pro
For longer-term storage, the freezer is your best friend. I portion out my cooled broth into freezer-safe containers or even large silicone ice cube trays for smaller, individual servings.
These individual portions are brilliant because you can just grab what you need without having to defrost a huge batch. Label everything with the date, because even though it feels like you’ll remember, you won’t!
Broth freezes incredibly well and can last for up to 3-4 months in a good freezer. When you’re ready to use it, simply thaw it in the fridge overnight or gently reheat it on the stovetop.
It’s such a satisfying feeling to know that even on the busiest days, a delicious, homemade ramen broth is just a defrost away. This kind of meal prepping truly makes enjoying gourmet-level food at home so much more accessible.
Troubleshooting Your Broth: Common Pitfalls and Quick Fixes
Let’s be real, even the most seasoned home cooks (myself included!) sometimes run into issues. It’s part of the learning process, and honestly, some of my biggest culinary breakthroughs came from trying to fix a “mistake.” It’s not about being perfect every single time; it’s about knowing how to pivot and save your hard work.
There have been times when my broth tasted a little bland, or perhaps I got a bit heavy-handed with the salt. Instead of tossing it all out in frustration, I learned a few tricks that can salvage almost any broth.
This isn’t just about being thrifty; it’s about developing a deeper understanding of flavor profiles and how different ingredients interact. So, if your broth isn’t quite hitting the mark, don’t despair!
There’s usually a way to bring it back from the brink and still enjoy a fantastic bowl of ramen.
| Common Broth Problem | Possible Cause | Quick Fix/Solution |
|---|---|---|
| Broth is too bland/weak | Not enough cooking time; insufficient bone-to-water ratio; lacking umami ingredients. | Simmer longer; add more umami (kombu, dried shiitake, a splash of fish sauce); add a small amount of concentrated chicken/pork base. |
| Broth is too salty | Over-seasoning; too much soy sauce/salt added too early. | Dilute with unsalted water or unseasoned chicken/vegetable stock; add a few raw potato slices and simmer for 15-20 minutes (the potatoes absorb salt, then remove); add a touch of sugar or mirin to balance. |
| Broth is cloudy/murky | Insufficient skimming; boiling too vigorously; bones not blanched properly. | Gently strain through a cheesecloth-lined sieve multiple times; slowly simmer with a cracked egg white (it will coagulate and trap impurities, then remove); next time, blanch bones and skim diligently. |
| Broth tastes greasy | Too much fat from bones; boiling too hard; not chilling/skimming fat properly. | Refrigerate overnight and skim solidified fat from the top; use a fat separator; next time, choose leaner bones or trim more fat before cooking. |
When Your Broth is Too Weak: Boosting Flavor Post-Simmer
So, you’ve simmered for hours, and your broth just isn’t singing. It happens! The most common reason, in my experience, is either not enough bones for the amount of water, or not quite enough cooking time to fully extract all those beautiful flavors.
But don’t fret! You don’t have to start all over. You can always boost the flavor.
My go-to quick fix is to add a small amount of a high-quality, concentrated chicken or pork base (check the ingredients for natural flavors!). A splash of good quality fish sauce can also add incredible depth and umami without making your broth taste distinctly fishy.
Another trick is to simmer a handful of dried shiitake mushrooms for an extra 30 minutes; their concentrated umami is a powerhouse. You can also reduce the broth gently – simmering it down will concentrate the existing flavors.
Over-Salting and Other Mishaps: Saving Your Culinary Creation
Okay, this is one I’ve been guilty of more times than I care to admit! You’re tasting, adjusting, and then BAM – too much salt. It feels like the end of the world for your precious broth, but it’s not!
Your first line of defense is always dilution. Have some unsalted chicken or vegetable stock on hand? Perfect!
Add some to your salty broth until it balances out. If you don’t have stock, plain unsalted water will work too, though it might dilute some other flavors, which you can then re-season.
A classic chef’s trick is to add a few peeled, raw potato slices to the broth and simmer for 15-20 minutes. The potatoes will absorb a significant amount of the excess salt.
Just remember to remove them before serving! A tiny pinch of sugar or a splash of mirin can also help to counteract the saltiness by balancing the overall flavor profile.
It’s all about adjusting, tasting, and bringing that equilibrium back.
Wrapping Things Up
And there you have it, my friends! From the very first blanching of bones to that final, perfect sprinkle of seasoning, crafting your own ramen broth is truly a labor of love. I know it can seem like a lot, but I promise, the effort you put in is repaid tenfold with every single delicious, deeply satisfying spoonful. There’s a special kind of pride that comes with knowing you’ve created something so incredible from scratch, something that brings comfort and joy. This journey in your kitchen is about more than just a recipe; it’s about connecting with your food on a deeper level and truly mastering a culinary art.
Useful Information to Know
1. Always use cold water to start your broth; this helps to slowly extract impurities and flavors, leading to a clearer broth.
2. Don’t be afraid to experiment with different bone combinations – pork and chicken offer a fantastic balance of richness and clarity.
3. A fine-mesh skimmer is your best friend in the initial stages for achieving a pristine, clear broth.
4. Dried kombu and shiitake are powerful umami boosters; adding them can elevate your broth from good to unforgettable.
5. Proper cooling and freezing are crucial for food safety and convenience, allowing you to enjoy your homemade broth for weeks or months.
Key Takeaways for Your Broth Journey
Embarking on the journey of making your own ramen broth is incredibly rewarding, and like any culinary adventure, it comes with its own set of principles that, once mastered, will consistently lead to exceptional results. The bedrock of any phenomenal broth lies in the quality and preparation of your foundational ingredients. Always opt for the freshest bones you can find, and don’t skip that crucial blanching step – it makes all the difference in clarity and taste. I’ve personally found that neglecting this early stage means playing catch-up later, and sometimes, you just can’t fix a cloudy, off-tasting broth.
Patience, as I’ve learned the hard way countless times, truly is a virtue here. A gentle, consistent simmer over many hours is non-negotiable for extracting that rich, gelatinous mouthfeel and complex depth of flavor. Rushing it only leads to disappointment. Furthermore, understanding umami, through ingredients like kombu and dried shiitake, is key to moving beyond a simple stock to a truly profound ramen broth. These elements don’t just add flavor; they add soul. Finally, seasoning is your moment to shine and personalize. Taste, adjust, and trust your palate. Don’t forget proper storage; it transforms your weekend effort into weeks of delicious, convenient meals. By focusing on these pillars – quality ingredients, patient simmering, umami layering, precise seasoning, and smart storage – you’re not just making broth; you’re crafting an experience that will impress both yourself and anyone lucky enough to share a bowl.
Frequently Asked Questions (FAQ) 📖
Q: Is crafting homemade ramen broth truly worth the time and effort it takes, especially when I can just grab an instant packet or go to a local ramen shop?
A: Oh, absolutely, without a shadow of a doubt! I get it, those instant packets are super convenient, and a good ramen shop is pure bliss. But let me tell you, stepping into your kitchen and creating that incredible, soulful broth yourself?
It’s a game-changer. I used to think the same thing – why bother with all the fuss? Then I tried it, truly committing to the process, and the depth of flavor, the richness, the sheer comfort of a homemade broth is unparalleled.
It’s not just a meal; it’s an experience. Think about it: a lot of that time is hands-off simmering. You’re mostly just letting magic happen on the stove.
And that first spoonful? It makes every minute worthwhile. Seriously, once you taste the difference, you’ll understand why it’s a labor of love that rewards you with something deeply satisfying and truly your own.
Plus, being able to tweak it exactly to your taste? Priceless!
Q: What are the absolute must-have ingredients or crucial steps to get that authentic, restaurant-quality depth in my homemade ramen broth? I want that rich, complex flavor, not just a watery soup!
A: This is where the real fun begins, and where I personally spent countless hours experimenting! To get that restaurant-quality depth, you’re looking at a few non-negotiables.
First, it’s all about the bones. For a truly rich broth like Tonkotsu, pork bones (especially trotters, neck, and backbones) are key, simmered for hours on end to extract all that incredible gelatin and flavor.
For lighter, clearer broths like Shoyu or Shio, a combination of chicken bones, or even chicken carcasses and feet, works wonders. Don’t skimp on rinsing and blanching those bones first; it’s a crucial step to remove impurities and ensure a cleaner, more pristine base for your broth.
Next up, umami is your best friend. Dashi, the Japanese soup stock made from kombu (dried kelp) and katsuobushi (dried bonito flakes), is often the foundation for that savory depth.
You don’t want to overcook these, though, a quick steep is usually enough to capture their essence without making it bitter. Finally, don’t underestimate the power of aromatics like onions, garlic, and ginger.
However, a pro tip I picked up through trial and error: add these in the last hour or so of simmering, especially for clearer broths. If you add them too early, they can break down and make your broth cloudy, and their delicate aromas might dissipate.
Oh, and for Tonkotsu, a rolling boil for an extended period, rather than a gentle simmer, is what helps emulsify the fat and gelatin, giving it that characteristic creamy, opaque texture.
It’s a combination of quality ingredients, patience, and these specific techniques that truly makes your broth sing.
Q: I’ve tried making broth before, and sometimes it just feels a bit bland or “off.” What are the most common pitfalls home cooks face when trying to make ramen broth, and how can I fix them?
A: I totally get it – I’ve been there more times than I care to admit! It’s easy to feel a little defeated when your homemade broth doesn’t quite hit that amazing mark.
From my own kitchen adventures, the most common reasons for a bland or “off” broth usually boil down to a few things. First, not enough simmering time or insufficient ingredients.
That rich, deep flavor comes from the slow extraction of collagen, fat, and marrow from your bones. If your broth tastes weak, you might need to simmer it for longer, or use a higher ratio of bones to water.
For a tonkotsu, we’re talking many hours, sometimes 10-12 or even more! Second, improper bone preparation. Did you thoroughly rinse and blanch your bones before the long simmer?
This step is crucial for removing impurities and preventing “funky” off-flavors that can make your broth taste muddy instead of clean and rich. I learned this the hard way – a little extra prep here makes a huge difference.
Third, not adjusting your “tare” (seasoning base) correctly. The broth provides the body and umami, but the tare is where the intense saltiness and specific flavor profiles (shoyu, shio, miso) really come from.
If your broth tastes bland, it might not be the broth itself, but that your tare isn’t strong enough or balanced well. Start with a solid tare, and remember to taste and adjust the seasoning for each bowl.
Every brand of soy sauce or miso can vary, so don’t be afraid to add a little more salt or other seasonings until it sings. Sometimes, just a dash of something like fish sauce or a secret blend of soy sauce, mirin, and sake can deepen that flavor profile beautifully.
Lastly, over-dilution or not reducing enough. If you’re constantly topping off your pot with water without allowing some reduction, your broth won’t concentrate.
Toward the end of the cooking process, stop adding water and let it reduce a bit to intensify those flavors. It’s a delicate balance, but getting it right is incredibly rewarding!